Installing Debian 11 from scratch


Pre-scriptum

I wrote this post a while back. Debian has progressed, and so has my understanding. Debian 13 “Trixie” has just been released.

Still, there’s some info in this post on setting up non-free audio/video stuff. It’s useful to me, so I’m reposting it.

Intro

So my ThinkPad just borked itself. It was running Ubuntu LTS. I got tired of Ubuntu’s faffing about with ads in the terminal, pushing private data to Amazon, and general asshattery. From a previous install I knew that installing Debian wasn’t as difficult as I recalled from the before times, so I went with that.

Unless otherwise stated, everything here happens in the terminal. Don’t be afraid, it’ll be ok. Just open a terminal.

The default on Debian 11 would be gnome-terminal.

Moving your data onto your freshly installed machine

You had backups, right? Before we do anything else, take that hard drive (or whatever) with your old data on it, connect it to your computer, and start moving the files over.

The fiddly stuff below will take a while, so let’s make good use of the time.

Getting up to date

While your data is being copied over, let’s get the OS up-to-date. Who knows how long that install ISO has been lying around there.

In your terminal, become root:

    su
    (Enter root password)

And run the update commands:

    apt-get update
    apt-get upgrade

Enable sudo

UPDATE: You can skip this step if you’re smart during the installer stage.

It works like this:

When the installer prompts you to set a password for the root user, leave the field blank. In the next screen, the installer will then let you create your own user. Sudo will be enabled, and your user will have sudo privileges.

Thanks @neil!

Or just keep doing it the hard way

So far, so good. On to more interesting things. We want to install the sudo command, because… I’m used to it, and I hate having to change my habits. That’s a perfectly cromulent reason.

Install the sudo package:

    apt-get install sudo

Now we have to amend the PATH variable in our bash settings, because otherwise we won’t find the command we need. (No idea why this is necessary. Whoever set things up this way: I have words to say to you.)

    export PATH="$/usr/sbin:$PATH"

Now close your terminal, and open it again – just to make sure the new path is loaded. Become root again:

    su
    (Enter root password)

Then add the user account in which you need to use the sudo privileges:

    adduser yourusername sudo

If the damn box still says “adduser: command not found”, just do

    /usr/sbin/adduser yourusername sudo

I swear, it’s there. Debian just doesn’t want you to know. Whatever.

Doing the evil thing: Add contrib and non-free repos

While I don’t want to recommend running non-free software, it can be rather practical for some things. Like getting your wifi working, if you’ve ended up with one of the many machines where that requires proprietary drivers.

So let’s add some package repositories! In your terminal, do

    nano /etc/apt/sources.list

and after each “main” that you see, add

    contrib non-free

Save and exit with Ctrl-O Ctrl-X, and run

    apt-get update

Getting wifi to work

Now with the repos for the dark side enabled, we can install the wifi drivers that at least my ThinkPad needs. You’ll have to figure out which ones are needed for your machine. I do:

    apt-get install firmware-iwlwifi

Good, that should do it. We’ll see after a reboot.

More evil proprietary stuff: multimedia codecs, playing DVDs

The steps in this section come from this page, which was recommended to me by the most excellent Neil Brown. Thanks!

You’ve done the update / upgrade dance described at the start of this post, right? If not, do it now.

Then let’s install the libraries that let us play DVDs:

    apt-get install libdvd-pkg

This will give you one of Debian’s lovely blue config screens that always pop up for the more serious stuff. Not to worry, just select the defaults and run with those.

At this point, in order for stuff to work I had to close my terminals, start them again, and become root as

    su -

Maybe this is about loading the path variable that we modified above. Who knows. Who cares.

Now download, compile and install libdvdcss. (This sounds way worse than it is. The reason you need to do this at all is the absolute state of global copyright law.)

    dpkg-reconfigure libdvd-pkg

Another blue config screen, another click on the default, off you go.

Next, we install the regionset command:

    sudo apt-get install regionset

and finally, all those juicy codecs:

    apt-get install libavcodec-extra

If your DVD player refuses to play your discs, use the regionset command to set your machine’s DVD region code to whatever the DVD demands. The region codes are listed on the regionset man page. (1 is for North America, 2 is for EMEA / South Africa / Japan, etc. I don’t make the rules.)

You’ll also want some software to, well, actually play those DVDs:

    apt-get install vlc

Now it works for me! I tested it with one of those top TERF wizard kid movies that I happened to have lying around.

Making CapsLock an additional Ctrl

The Ctrl key is in the wrong place on modern standard keyboards. (No, I’m not interested in your views on this point.) Let’s fix that.

While this has to be one of the most popular modifications to the keyboard layout, it has apparently
been less than straightforward historically.

Fortunately, things are better now. Open the gnome-tweaks tool, and you’ll find everything you need under “Keyboard & Mouse” > “Additional layout options”.

This will require a restart, which by this point is probably advisable anyway, what with all the stuff we’ve been installing and configuring.

(Optional) Restoring passwordless ssh login

This use case is a lot more specific than the rest, so feel free to ignore this section.

I have a managed server that I can ssh into. That’s nice! I’ve set it up so that I can just type “ssh (server shortname) on the console, and I’ll be logged in. This is also very handy for running scripts. Unfortunately, it didn’t work after the Debian install, even though I had restored my old ssh keys from backup.

The error message read:

    sign_and_send_pubkey: signing failed: agent refused operation

This turned out to be a permissions problem. I fixed it in the following way (all this happens on my laptop, not on the server):


  1. Go to your home directory:


    cd ~


  2. Set the correct permissions for the .ssh directory:


    chown 700 .ssh


  3. Go into the .ssh directory:


    cd .ssh


  4. Make sure the permissions for your ssh key files are set as they should be, like so:


    chown 600 id_rsa
    chown 644 id_rsa.pub


  5. Add your private key to the OpenSSH authentication agent:


    ssh-add

That’s it. Now everything should work as before.

Done. I think.

With this, we should have most of the boxes ticked. Of course you’ll want to install more stuff as needed.

Enjoy your new Debian system!
If corporations can have rights, so can nature

Good books entertain and inform. Great books bust open your worldview and leave you with a different, much broader way of seeing things.

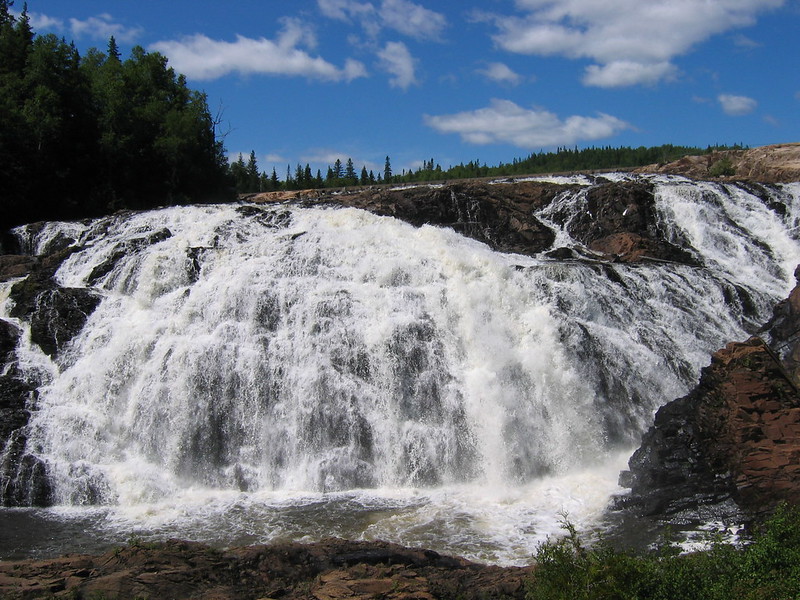
“Is a river alive?” by Robert Mcfarlane is one such great book. From the cloud forests of Ecuador through the violated rivers of India to a wild stream in Quebec, the author makes a persuasive case for giving legal personhood, not just to rivers, but to forests and mountains too.

Photo by beadwoman on Flickr. CC-BY-NC-ND-2.0

In western society, we are used to treating nature as an asset — as money in the bank. A mountain is granite or coal to be mined. There’s oil to be drilled out from under the sea. The river’s flow is just waiting to be turned into electricity. We use up nature, and discard the remains. We give legal personhood to the corporations that do all these things. In many places, they have more rights than people do.

Indigenous people around the world have always seen nature as alive, and have treated it as a sacred relative to be honored. McFarlane acknowledges that he is merely narrating this argument for western audience.

Much of what he tells us comes from the courageous indigenous activists who, joined in the global Rights of Nature movement, have been fighting to safeguard the lakes and rivers, the forests and the mountains for a long time. He makes repeated reference to Robin Wall Kimmerer’s “Braiding Sweetgrass“.

It’s an important story beautifully told. It’s also an urgent call to action. The rivers, the mountains and the forests sustain our lives on this planet. We are destroying them a little more every day once enough of them are gone, so will we be.

We can prevent this, and we must. Giving nature standing to defend itself in court is a crucial first step.

Related reading

Paddling in paradise

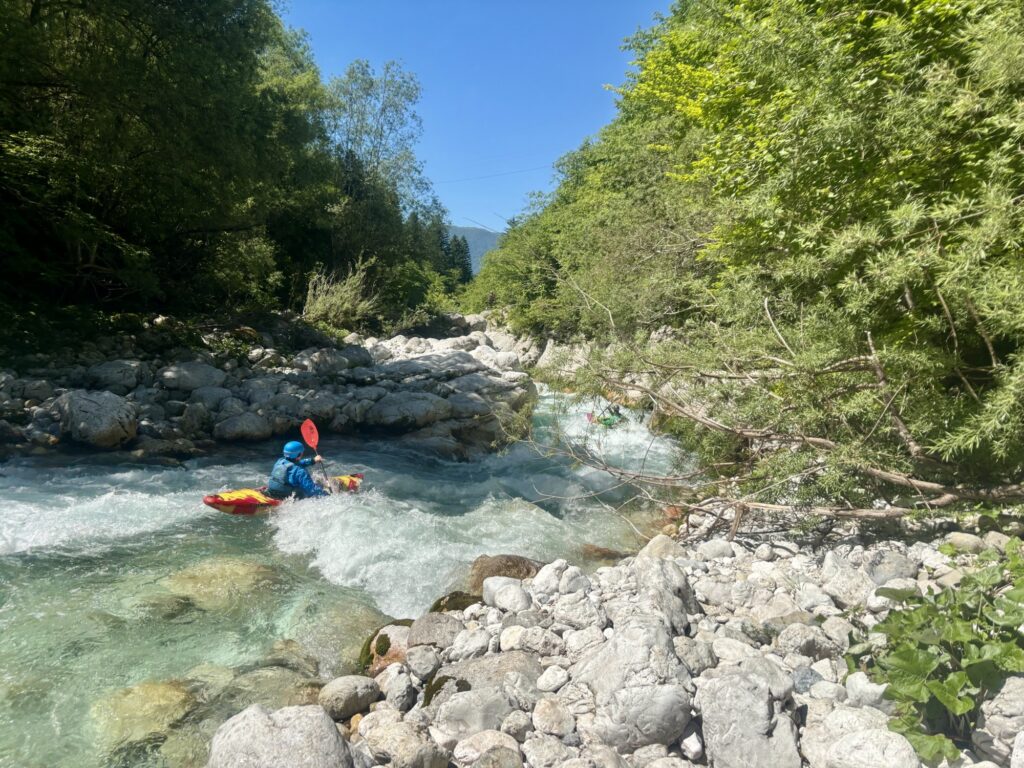
I’m spending a week or so in Slovenia’s Soča valley, one of Europe’s best spots for whitewater kayaking.

Before sunrise

This morning, we had a lovely fun run on the Koritnica river this morning. Good water level at 126cm / 7m3.

Checking out the first rapid

This is such a beautiful creek! It starts out with a rapid. At the end, you want to catch the eddy on the left, get your bearings, and then head into the gorge.

Off into the gorge

There’s two waves in there, and the second one flipped me over today. Annoyingly, I somehow slipped out of the boat before I got much of a chance to roll, so I ended up swimming. Thanks to my mates who caught the boat!

The rest of the run was two wonderful hours just jumping from one eddy to the next. With the clear turquoise water and the lush green forest, this is one of my favorite places on earth.

Playtime!

Reviewing the Zuriga E2-S espresso machine


Content warning: Blatant consumerism. This is a post about espresso machines. Nobody NEEDS an espresso machine in their home. These things are an expensive luxury, and a superfluous indulgence. There are better ways to spend your money, for example by giving it to people who have less than you. The decision to buy one isn’t easy to reconcile with the desire for a better world where resources are more fairly distributed. Seen that way, buying this sort of thing is a moral failing, which I’m guilty of.

It is a truth universally acknowledged, that a man in his middle age, whether or not he is in possession of a good fortune, must be in want of an espresso machine.

I like espresso. Indeed, I like espresso so much that over time, I’ve learned to distinguish good espresso from bad. In 2007 I picked up a Pavoni Europiccola on eBay. It’s perhaps the simplest possible portafilter machine out there. Here’s a short video of James Bond using one to make an amazingly bad espresso.

It’s not just a design classic. It also taught me a lot, especially about all the things that can go wrong when making espresso: machine not hot enough; machine too hot; wrong amount of water; wrong amount of pressure; and so forth. Through all the wrestling, I really grew to like my Europiccola. Plural, actually: I ended up buying a couple more, and using them for parts, ending up with something like Theseus’ espresso machine.

Longing for comfort

Still, after about 15 years of pulling on the Europiccola’s lever, I felt it was time for an upgrade. As one does, I spent a lot of time online, looking for the right thing. That involved deciding what I actually wanted and needed.

Did it need to be large? No. I’m currently more or less the only person in the house who drinks coffee. It should be able to serve a few guests without breaking a sweat; but I certainly don’t need a café-level device. Quite to the contrary: our kitchen is pretty small. Space is at a premium, and I can’t be blocking a metre of counter space with an oversized machine that doubles as a space heater.

Of course, I wanted something that makes a good espresso, as well as milk foam. How much control do I really want, though? Some machines will ask you to adjust the water temperature, the pressure coming from the pump, and other parameters.

I decided that I didn’t want that. I want to drink coffee, not write a dissertation about it. This let me cross a whole bunch of machines off the list.

Enter the Zuriga

Finally, I stumbled on the Zuriga E2-S. It’s developed and built by a startup in Switzerland who seem to be doing generally solid work, and it matched what I wanted: a small machine without too many bells and whistles.

Yes, it was (and is) comparatively expensive. On the other hand, we’re talking about home espresso machines — a product category that is the very embodiment of pointless luxury. If you’ve decided to drop a stack of bills on one, there’s not much use in pinching pennies. If you want to save money, just don’t buy an espresso machine. You’ll be fine, I promise.

Aaaanyway. At the time, Zuriga would build your machine only after you’d ordered it, and paid for it. I did that, and after about two months, my machine arrived by mail. The unboxing experience was actually fun: The packaging was entirely plastic-free. They’ve designed the box such that you can use it to ship the machine back to them for maintenance. Smart!

Promo shot of the Zuriga espresso machine

The machine itself is built like a rock. Most of the body is formed from a single thick sheet of stainless steel. When the apocalypse comes, I’ll be using this for cover as I shelter from the bullets of roving bandits, until they’ve come close enough for me to bash their heads in with my trusty ThinkPad.

The water tank is made of glass, not plastic. The tank cover is just a (nice!) piece of wood. It’s all very simple, and fits together very well.

Unlike a lot of machines in the price range, this one comes with pretty much all the accessories you’d want: A little jug for frothing milk, a tamper, small and large sieve, single and double runouts for the coffee, as well as a blind sieve (needed for cleaning).

The manual is a thing of beauty: Not only is it actually useful, it’s also designed by someone who knows about layout and typography. I frankly didn’t expect to come across a manual like this in the 21st century anymore.

Let’s have some espresso!

After the first-run ceremony described in the manual, it turned out that making espresso on the Zuriga really is as simple as I hoped it would be.

The machine takes just two minutes to heat up. There’s no need to leave it on all the time, so it won’t consume much power. In fact, after 15 minutes it goes to sleep.

It’s a single-circuit design. But in practice, this isn’t a disadvantage. To make milk foam, you just flip out the nozzle. The LEDs on the machine go from white to orange, letting you know that the steam mechanism is engaged. It takes about 20 seconds to heat up — just enough time to get the milk from the fridge, pour it in the jug, and wipe your counter a little. And then it’s ready to blast your milk. Once you’re done, just flip the nozzle back. The Zuriga will immediately be ready to make more coffee.

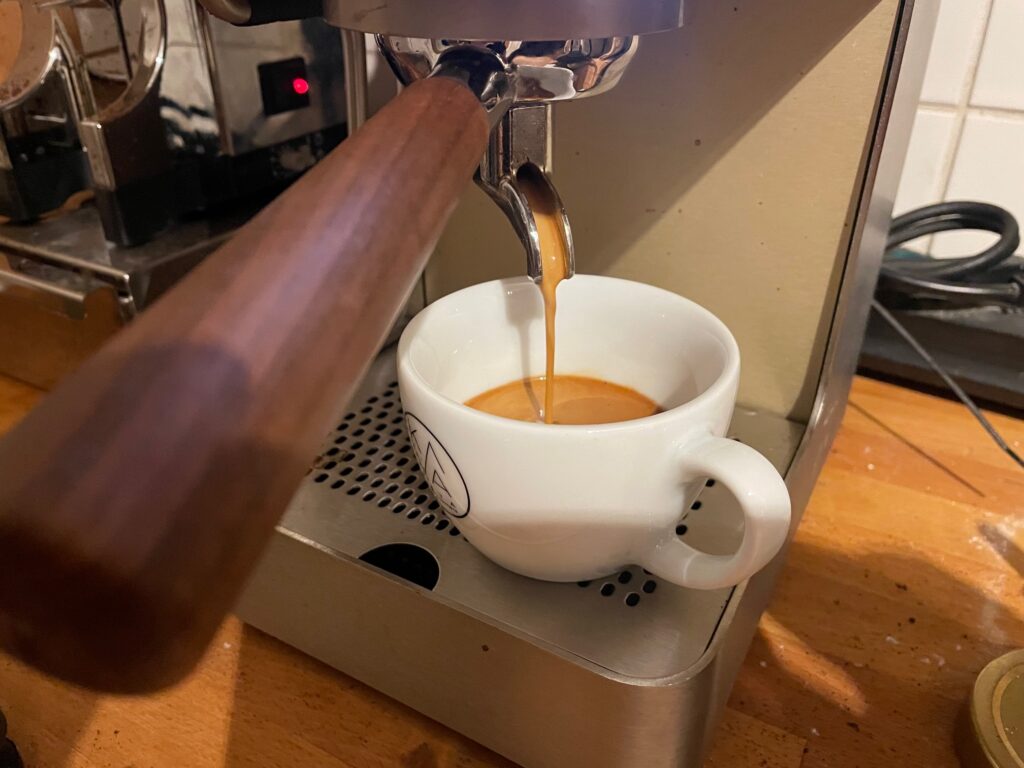
Close-up shot of the Zuriga machine making an espresso. The coffee is running into a white cup. It's light brown and creamy.

Every 4-8 weeks, it’s a good idea to clean the brewing group. This is no trouble at all. Just take away all the loose parts, flip the machine on its head, and open a single Allen head screw. Wash everything, and put it back. Taking out the seal can be a bit fiddly, but otherwise the process couldn’t be easier. This is what good design does.

The way the machine is designed, it should last a long time. There are no moving parts except the pump. There’s nothing that’s pressed into anything else, where you’d have mechanical wear and tear. Everything is either a fixed part of the machine, or is held in place by gravity alone.

…but my fiddles!

There’s nothing to adjust here, nothing to tweak. The Zuriga will always deliver water at 93°C and 15 bars of pressure.

The parameters you can influence are outside the machine: How finely you grind the coffee; how much you tamp it; for how long you let the water run.

If you want to have more control over every detail, the Zuriga isn’t the device for you. Buy something else.

That’s probably not enough for a dedicated coffee freak. But for me, it’s plenty. I can get pretty much everything I want out of that machine. The Zuriga is a paragon of Swiss stolidity. It does this one thing, exceedingly well.

Compared to the Europiccola with its volatile temper, the Zuriga is much less brutal with the coffee’s aromas, and I’ve ended up using ligher roasts for the most part.

So, in sum

After two years of daily use, I’m still in love with the Zuriga. There’s a few things one might quibble with, though none of them are a dealbreaker for me:

  • Yeah, it’s expensive for what it does. See above. Also, you might discover that your grinder isn’t as good as you thought it was, and you need a better one.
  • There’s a little basin for water that the machine expels as it works. This is made of plastic, and feels a little cheap. It’s invisible during normal operation though.
  • The cover over the tank is just held in place by gravity. It also has the job of pushing the silicon water hose down into the tank. This works, but is considerably less refined than the overall design. On the plus side, it’s definitely not more complicated than it needs to be.

I’m really happy with this machine. It makes very good coffee. It’s nice to look at, and it’s fun to use. It doesn’t use much space or energy. It causes no trouble. It’s a reliably happy part of my day.

Note that according to the website, the company currently only sells to Switzerland, Austria, and Germany. I’m not sure how to get one if you’re not in one of those countries, but maybe talk to them?

Recipe: Kimchi crunchies

One of the people I follow on the Fedi shared a food pic of a starter they’d had in a vegan restaurant in Lisbon. I was hungry, so I decided to reverse engineer the thing. As it happened, I had almost all required ingredients around.

This is a starter that comes with strong flavours. It should be brightly acid, salty, spicy and umami. It should combine crunchy and soft textures.

No worries though, this one’s really easy to prepare, provided you’re minimally competent at deep-frying.

Use rice paper for a vegan recipe (and check your kimchi for fish sauce, if you didn´t make it yourself. Which you should, cause it’s easy and fun.)

(JFC, I suck as a recipe writer. Let’s skip the poetry, and head straight for the prose.)

A plate filled with kimchi crunchies: Deep-fried crisps with chopped kimchi on top, decorated with spring onions

Stuff you need

  1. Rice paper in pieces, or shrimp chips (what are these called in English?). You’ll want 2-3 per person.
  2. Oil for frying
  3. a small carrot
  4. a stalk of celery
  5. a couple of bell peppers (red and green. In a pinch, just one will do)
  6. spring onions
  7. a lemon
  8. kimchi

Chips & veggies on a plate

How to prepare

  1. Heat the oil, and deep-fry the rice paper or shrimp chips
  2. Julienne the veggies, and dump them all into one small bowl.
  3. Squeeze the lemon, and pour the juice over the veggies. Stir.
  4. Cut the spring onion into fine diagonal slices – it’s more of a decoration here.
  5. Chop the kimchi.

From now on, timing matters: don’t start putting anything on the chips / rice paper until everything else is ready, and your hungry people are seated at the table. You don’t want things to go soggy.

  1. Put some chopped kimchi on the rice paper / shrimp chips
  2. Ladle some julienned veggies on top
  3. Put a couple of spring onion slices on it
  4. Repeat for the rest of the chips / rice paper pieces.

You’re done! Now, serve the whole thing quickly.

Once you’ve practiced this a couple of times, you’ll probably want to adjust the flavour by seasoning the veggie julienne, with whatever sauces / spices you think make sense.

Close-up of the left pocket of a blue jeans. You can clearly see the contours of a smartphone in the coloring of the fabric.

I did the jeans thing, and I liked it


Let me start with a confession. I’m a lazy dresser, even by German standards. Ideally, I don’t need to spend much (or any) time thinking about what to wear. And I’m certainly not very aware of trends.1

I’m also trying to buy fewer clothes, and wear them for longer. When I heard about dry selvage jeans, I dismissed the idea at first. It sounded so… fashionable:

Dry denim, also referred to as “raw” denim or unwashed denim, refers to a pair of untreated denim, which means they have not been washed or bleached. So instead of creating a worn-in look at the laundry facility you break in these jeans yourself. It’s a long term commitment and the outcome will depend on how much you wear them. With time you’ll get a personal pair of jeans with whiskers, honeycombs and fading created by your lifestyle.

Eventually, the concept grew on me. Just one pair of jeans, that I wear always, for everything? No more thinking about what to put on? Sign me up.

Through a friend I hit upon Nudie Jeans. They’re a Swedish company that’s been going for a while, and they seem ok. Also, free lifetime repairs! In the end, I bought a pair of Grim Tims.

Professional photo of a pair of dark blue jeans on a neutral background
Kinda what they looked like when new, though it’s not the exact model. Pic: Nudie

This is what they looked like when new:
Kinda what they looked like when new, though it's not the exact model. Pic: Nudie

A grim start

The first few weeks (or was it months?) were grim indeed. The jeans were quite tight, and made some movements hard. But I did like them. They looked great, and something about their austerity spoke to me.

I wore them on most days for a year, no washing. (It’s not as gross as it sounds, trust me.) The trousers became softer, smoother. And eventually they took on the shape of my body.

A worn pair of blue jeans, with areas at the knees and elsewhere where the colour has worn off
Jeans at two years

The color gets worn away in some places more than others, and the material takes on a life of its own. I really love the result.

Wear and repair

When the jeans started developing tears and holes, I took them to the Nudie shop in Munich. (They don’t have many physical shops, I’m just lucky.) You can clearly see where I carry my phone.

Close-up of the left pocket of a blue jeans. You can clearly see the contours of a smartphone in the coloring of the fabric.

The guy in the shop listened to my story about how hard the first few months were. He said: “Yeah, I can imagine. That’s one of the first models, before we started adding a little stretch to the material.” Oh ok… Then he repaired them for free, within a few days. Amazing!

The bottom of a jeans leg. The low end is folded up, and where the fold was worn out, it's been repaired with lots of stitches.

By now this pair is probably beyond repair. But I’ve come to love this approach to clothing. So I’ll be buying a new pair soon. And I’ll hand in the old one, because Nudie uses those as repair materials, and gives me a 20% discount on the new ones. Nice!

(You may have gathered that I’m not exactly fashion influencer material, and the company isn’t paying me anything for this post. They hardly know I exist.)

  1. I don’t mean to bash people who are into fashion. That’s a great passion to have. I wish I, and many others, were more like these awesome guys. ↩︎
OSM screenshot of the Bilbao - Donostia region, showing the Gorbea national park

Mulled wine


When December comes in Germany, mulled wine is everywhere. Every town has its Christmas market, and at each of them, you´ll find several stalls that sell the cheap red plonk with a few spices and lots of sugar.

But there´s a cup of mulled wine that is especially dear to my heart. Let me tell you about it.

More than twenty years ago, living in Madrid on a student exchange program, I went to visit my friend Sebastian in Bilbao. Together, we went to spend a weekend in the Basque mountains.

Spain’s northern cost is gloriously rugged and earthy. It’s a world away from the cheap resorts full of drunk tourists on the Mediterranean coastline, and even farther from the endless expanses of plastic in the country’s south-east, where immigrants from the poorest parts of the planet work in terrible condition to supply Europe with cheap tomatoes and cucumbers.

Sebastian’s flatmates, proud Basques, knew their region very well, and supplied us with helpful hints. We set off by bus on mid-Friday, riding through a torrential downpour towards the natural park of Gorbeia. We entered the park, found a shelter to spend the night in, and roasted chicken legs in the fireplace.

Setting off on Saturday morning, we figured we had taken too much food. So we ditched some canned beans. Someone else had left a carton of red wine, and we took that in return on our hike up the mountain.

It was early May. The weather in the Biscay region changes rapidly. A sunny morning quickly became overcast, and worse. By the time we reached Gorbeia´s summit, there was a snowstorm. The wind was blowing so hard that the crucifix at the top of the mountain had horizontal icicles on it.

We clearly weren´t equipped for this sort of thing. We were cold and wet. We hadn´t even brought enough water, and it wasn´t clear when we would find any. We packed our bottles full of snow, in the hope that it would melt later, giving us a minimal supply.

Fortunately, the weather improved a bit when we hiked down the other side of the mountain. But there was a new worry. Sebastian´s flatmate had told us about a cave where we could spend the night. No need to bring a tent! He had given us a fairly good description, and pointed at our map. But as we were standing there, trousers streaked with mud, we realized that finding the cave was going to be difficult.

The forest was no doubt beautiful. Yet in our condition – tired, wet, cold, thirsty -, it started looking a tiny bit inhospitable. We searched and roamed, trying to find the cave that would give us shelter for the night. It was somewhere around here, but where?

Suddenly, Sebastian spotted a horse in the forest. To all appearances, it was just roaming free. Do they keep semi-wild horses in the Basque country? We didn’t know. We decided to take a closer look, and slowly walked towards the animal. When we were close enough, we realized that it was standing right in front of our cave!

Relieved, and with many good words for the horse (which left of its own accord), we occupied the cave and made ourselves at home. In the late afternoon of a long day, the fire we built was a wonderful source of warmth and comfort. The appearance of the horse gave the whole evening a magical air, as if we had been guided by a unicorn. We put a couple tins of ravioli on the fire, and when they were hot, we found them a meal fit for a king.

Then we recalled the carton of red wine. We poured it into one of the tins. We found an orange in our backpacks. We squeezed its juice into the wine, and threw some peel in for good measure. Then the tin went back onto the fire.

And that cup of mulled wine was the most magical I’ve ever tasted.

The night was quiet. In the morning, we were awoken by a hiker who climbed up to the cave and greeted us with “Egun on” – “good morning” in Basque. We packed our bags, and hiked the rest of the way out of the national park.

It´s been over two decades. In the meantime, Sebastian and I have grown from boys into men. We´ve found partners, had kids, built lives. We still go on mountain adventures together, and each one is magical in its own way. There’s a mutual trust that comes from hiking through a snowstorm and finding what is to all intents and purposes a unicorn.

The mulled wine at the Christmas markets? That always falls short of what my heart expects.

Making notebooks

I live my life in a bunch of different contexts. I’m a father, and a husband. I’m a professional in my job, and an amateur in a million things. I’m an outdoors person. I have little bunny rabbits in my brain that constantly hop every which way, and come up with ideas anytime they like.

Accordingly, I have too many ways of keeping track of stuff I need to remember. There’s various todo lists at work, in a plethora of tools. Some things live in email. Sure, I have a smartphone with a bunch of note-taking apps; but writing things down there takes long, and retrieving it even longer. If I recall that I put it there in the first place, that is.

That’s why I like notebooks. With blank pages. They allow me to jot down a few words; to make a quick drawing; or to write thoughts down in longer blocks. Except that I like notebooks perhaps a little too much. I’m prone to buying very nice ones, and then not using them, because I don’t feel that today’s shopping list is worthy of a place in my 25€ notebook.

So, depending on your perspective, it’s either complicated, or I have entirely too many hangups about everything. (insert whynotboth.gif) The good news is that, after too many years of mentally tying my shoelaces together in this way, I have hit upon a solution:

I make my own cheap, trashy notebooks!

A stack of 8 notebooks

This way, I can have a small, disposable notebook. I know it’s made out of common-or-garden printer paper. There’s nothing special about it. Plus, it’s so small that I can carry it everywhere in my back pocket, without even noticing it’s there. Great!

Here’s how I do it.

It’s easiest to make these things in batches. A batch takes about an hour, and will give you maybe 8 notebooks. Those tend to last me roughly a year.

Find a table with some space on it. You’ll need:

  • a bunch of printer paper
  • a couple of sheets of thicker paper, for the covers.
  • a ruler
  • a pair of scissors (if you have a paper cutting machine for some reason, that’s great. Use it.)
  • some clamps – clothespins will do fine
  • a nail
  • a hammer
  • a sturdy sewing needle
  • some thread
  • an old piece of wood as a mini workbench

OK, let’s go

  1. Cut the A4 sheets in half, and those pieces in half again. (For Europeans and everyone else using proper formats, the result is A6. For USians, it’s probably 1/34th of a football pitch by one stone or something. Who knows. Who cares.)

A5 sheets (well, really A4 sheets cut in half), clipped together, in a cutting machine

  1. Stack your new sheets. In my experience, 10 sheets are about right.

8 piles of cut sheets, some of them clamped together

  1. Now cut your cover sheets to size. If you’re making a batch of eight notebooks, you’ll want eight cover sheets. When done cutting, align neatly, and put on a clamp to hold the sheets in place.

That’s the paperwork done! Now let’s turn all those sheets into a little book.

  1. Take one stack of sheets. Fold the cover sheet along its centerline, put it back on the stack, and reapply the clamp. Check the alignment one last time.
  2. Next, we need to make some holes for the thread that’s going to hold our books together. Put your piece of wood on the table. Put the stack of sheets on top, with the cover facing up. Grab your nail, and put it in the middle of the centerline. With the hammer, punch a hole into the stack.
  3. Repeat the punching along the centerline, for a total of seven holes, evenly distributed.

stacked sheets + cover sheet lying on a piece of wood. They're clipped together. A nail is sticking through the middle, and a small hammer is lying next to them.

  1. Time to sew! Thread your needle, and start going through the holes. Just up through one hole, and down through the next – in the simplest way possible. Leave about 10cm of thread hanging out the end.

a notebook in the process of sewing

  1. When you’ve reached the end of the row of holes, go around the outside, and turn back the way you came. This time, if you went down through a hole on the way there, you’ll go up through that hole on the way back.
  2. Fold your notebook. The result should look like this.

Close-up of a notebook, focusing on the seam


Congratulations! You’ve made a bunch of notebooks.

I usually keep only one of these notebooks active at a time, to avoid confusion. It lives in my back pocket. When I go out, I usually carry a small pencil along – those short ones from Ikea work great.

By the time the notebook is filling up, the covers will often look quite bent and crumpled. My wonderful partner has made me a perma-cover out of an old bicycle inner tube. This makes the notebook a bit thicker, but it keeps it well protected. It also looks pretty cool.

Enjoy your notebooks!

Finding the sun

(February 2025)

It’s been grey and overcast here for a while. Last Saturday I simply couldn’t take it anymore. Something had to be done! So I put on my hiking boots, and went up a mountain. If the sun didn’t come to me, I would just have to go and
find the sun!

The Brünnstein is a not-terribly-high mountain nearby, peaking at 1634m. I picked it because a) I hadn’t been there before, and b) the relevant apps offered a tour that looked
like what I wanted.

When I parked the car at the trailhead, everything was still depressively grey. Not so much weather, more like an absence of weather. The path soon led me into the forest, and took on a substantial grade.

There was still a lot of snow on the ground, and I was happy to have my trekking poles. The forest felt a little mysterious. Finally, I approached the upper edge of the fog that’s been plagueing us for weeks:

Hiking into the sunlight was magical. The rays on my face felt great after such a long time. And the view above the clouds was beautiful:

There are two routes to the summit. One is a very easy via ferrata. I had brought a band sling and a couple of carabiners, so I could improvise a climbing harness. But I’m not a very experienced mountaineer, and all that snow on the ground didn’t inspire confidence.

So I decided to save the via ferrata for spring, and took the easier — if slightly longer — path to the summit. This turned out to also be something of a climb. Not really dangerous or difficult, but interesting enough that the local hiking club had fixed a bunch of substantial steel cables to the rocks,
so climbers could secure themselves.

Arriving at the summit was just perfect. I mean, look at this view!

The mountain has two peaks. The one that’s visited most is what you see in the picture, just by the little chapel. The actual, slightly higher peak (by maybe 2 meters, if that) is a little away over a ridge. I dithered whether I should
risk the snow-covered, narrow ridge. In the end I decided that I would be really annoyed with myself if I didn’t. So I went, and it was fine!

I went home the way I had come. Only much happier. Mountains are good for the soul.

Freeing up disk space on Debian

[This post is above all for my own reference, so I’ll know what to do the next time this problem occurs.]

My Thinkpad’s SSD has an impolite tendency to run out of disk space, even though I might not really be adding lots of data. It seems to be mostly cruft that Debian accumulates, perhaps out of a desire for thorough record-keeping.

Looking for ways to free up disk space, I found this StackExchange post. It has bunch of ways for giving my hard drive a good scrub.

Let’s see what they do!

Helpful commands

  1. Start by emptying your Trash bin.

2. Clean up logs – this freed about 3GB of disk space.

sudo journalctl --vacuum-size=300M # reduces the logs to 300 MB

This freed about 3GB of disk space.

More log cleaning. Did not have any visible impact:

sudo logrotate /etc/logrotate.conf # compresses or (?) deletes system logs

3. Delete cached packages. I did this before starting a more systematic analysis, so I can’t say how much space it freed up. But it was easily more than one GB:

sudo apt clean # deletes packages that were cached for installation

4. Remove unused packages. Freed up a cool 1.9 GB:

sudo apt autoremove # removes unused packages

That’s all the straightforward commands that the linked post provided.

Finding large files

In addition, it told me how to find large (<100MB) files, so that I can check whether I want to delete them:

sudo find / -mount -type f -size +100M -exec du -h {} \; | sort -n

But most of the results looked like they were at least somewhat important, so I didn’t actually go and delete any of them.

Remember to floss regularly

Maybe I should simply put all these commands into a little script, and run that as a cron job? Once a month or so?