Making notebooks
I live my life in a bunch of different contexts. I’m a father, and a husband. I’m a professional in my job, and an amateur in a million things. I’m an outdoors person. I have little bunny rabbits in my brain that constantly hop every which way, and come up with ideas anytime they like.
Accordingly, I have too many ways of keeping track of stuff I need to remember. There’s various todo lists at work, in a plethora of tools. Some things live in email. Sure, I have a smartphone with a bunch of note-taking apps; but writing things down there takes long, and retrieving it even longer. If I recall that I put it there in the first place, that is.
That’s why I like notebooks. With blank pages. They allow me to jot down a few words; to make a quick drawing; or to write thoughts down in longer blocks. Except that I like notebooks perhaps a little too much. I’m prone to buying very nice ones, and then not using them, because I don’t feel that today’s shopping list is worthy of a place in my 25€ notebook.
So, depending on your perspective, it’s either complicated, or I have entirely too many hangups about everything. (insert whynotboth.gif) The good news is that, after too many years of mentally tying my shoelaces together in this way, I have hit upon a solution:
I make my own cheap, trashy notebooks!
This way, I can have a small, disposable notebook. I know it’s made out of common-or-garden printer paper. There’s nothing special about it. Plus, it’s so small that I can carry it everywhere in my back pocket, without even noticing it’s there. Great!
Here’s how I do it.
It’s easiest to make these things in batches. A batch takes about an hour, and will give you maybe 8 notebooks. Those tend to last me roughly a year.
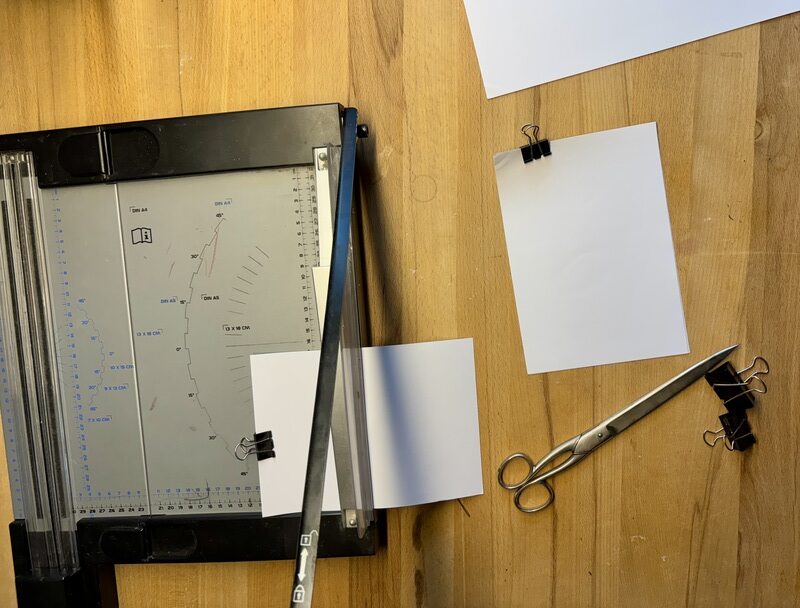
Find a table with some space on it. You’ll need:
- a bunch of printer paper
- a couple of sheets of thicker paper, for the covers.
- a ruler
- a pair of scissors (if you have a paper cutting machine for some reason, that’s great. Use it.)
- some clamps – clothespins will do fine
- a nail
- a hammer
- a sturdy sewing needle
- some thread
- an old piece of wood as a mini workbench
OK, let’s go
- Cut the A4 sheets in half, and those pieces in half again. (For Europeans and everyone else using proper formats, the result is A6. For USians, it’s probably 1/34th of a football pitch by one stone or something. Who knows. Who cares.)
- Stack your new sheets. In my experience, 10 sheets are about right.
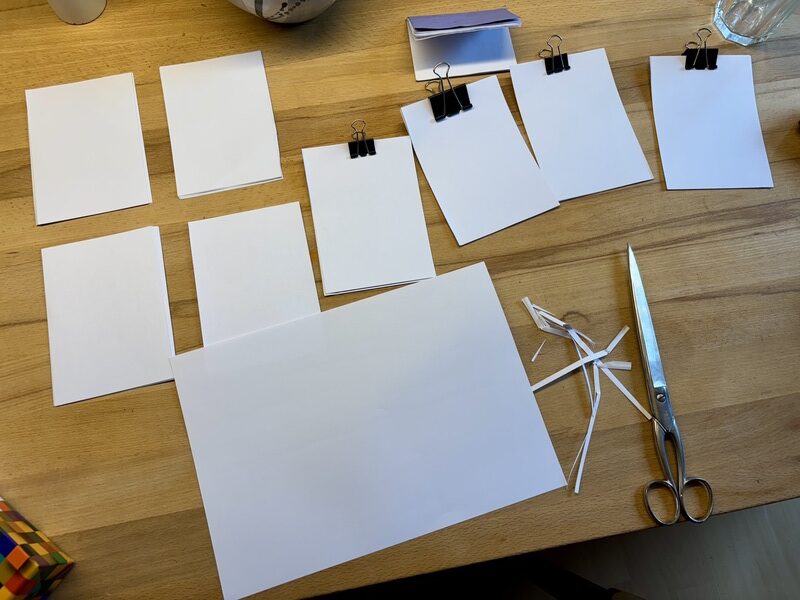
- Now cut your cover sheets to size. If you’re making a batch of eight notebooks, you’ll want eight cover sheets. When done cutting, align neatly, and put on a clamp to hold the sheets in place.
That’s the paperwork done! Now let’s turn all those sheets into a little book.
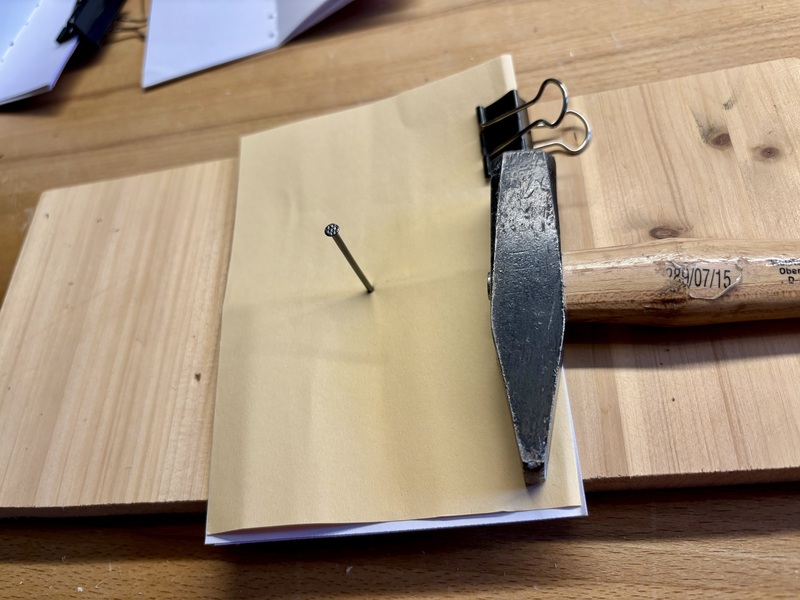
- Take one stack of sheets. Fold the cover sheet along its centerline, put it back on the stack, and reapply the clamp. Check the alignment one last time.
- Next, we need to make some holes for the thread that’s going to hold our books together. Put your piece of wood on the table. Put the stack of sheets on top, with the cover facing up. Grab your nail, and put it in the middle of the centerline. With the hammer, punch a hole into the stack.
- Repeat the punching along the centerline, for a total of seven holes, evenly distributed.
- Time to sew! Thread your needle, and start going through the holes. Just up through one hole, and down through the next – in the simplest way possible. Leave about 10cm of thread hanging out the end.
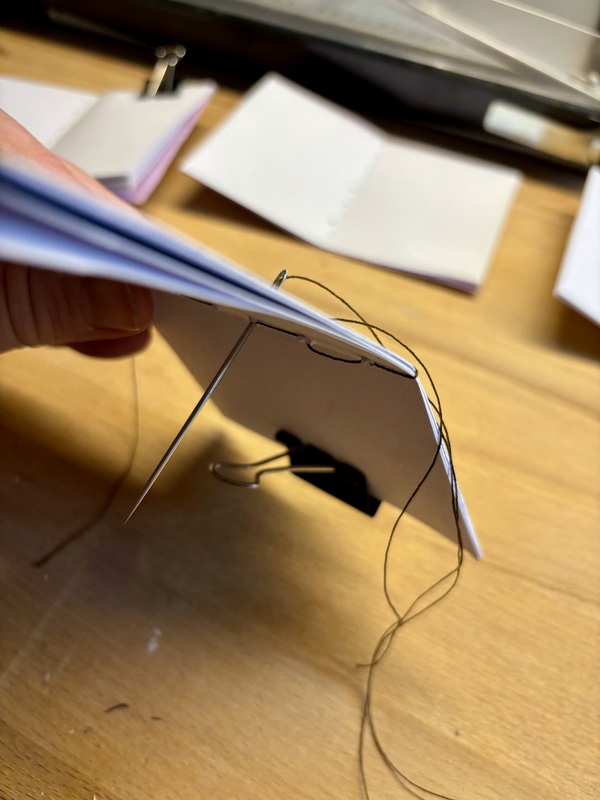
- When you’ve reached the end of the row of holes, go around the outside, and turn back the way you came. This time, if you went down through a hole on the way there, you’ll go up through that hole on the way back.
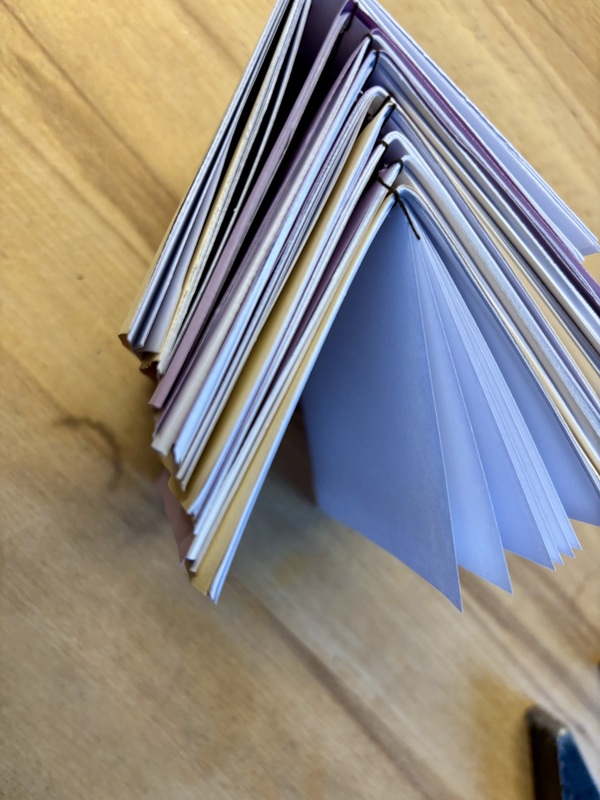
- Fold your notebook. The result should look like this.

Congratulations! You’ve made a bunch of notebooks.
I usually keep only one of these notebooks active at a time, to avoid confusion. It lives in my back pocket. When I go out, I usually carry a small pencil along – those short ones from Ikea work great.
By the time the notebook is filling up, the covers will often look quite bent and crumpled. My wonderful partner has made me a perma-cover out of an old bicycle inner tube. This makes the notebook a bit thicker, but it keeps it well protected. It also looks pretty cool.
Enjoy your notebooks!